How to Build a Sturdy 8x12 Storage Shed: Materials and Construction Plans

How to Build a Sturdy 8x12 Storage Shed: Materials and Construction Plans

Building Your Dream 8x12 Storage Shed: A Step-by-Step Guide

So, you're ready to tackle building your own 8x12 storage shed? Fantastic! It's a rewarding project that will give you a fantastic sense of accomplishment, and a great place to store all that stuff cluttering up your garage or house. This guide will walk you through the process, from planning and materials to construction and finishing touches. Let's get started!

Planning Your Shed: Location, Permits, and Design

Before you even think about buying lumber, you need a solid plan. This isn't rocket science, but careful planning saves headaches down the line.

Choosing the Perfect Spot

First, pick your shed's location wisely. Consider:

  • Accessibility: Will you need a vehicle to access it? Make sure there's enough room to maneuver.
  • Sunlight and Shade: Too much sun can damage stored items; too much shade can lead to dampness.
  • Drainage: Avoid low-lying areas prone to flooding. You might need to level the ground.
  • Utilities: Is there a nearby power source if you plan on adding electricity later?
  • Local Regulations: Check with your local authorities about any setbacks or zoning restrictions before you even break ground.

Permits and Inspections

Don't skip this step! Most localities require building permits for structures like sheds. Contact your local building department to find out the requirements and necessary paperwork. They'll likely inspect your work at various stages of construction to ensure compliance with building codes.

Design and Features

Think about the features you want in your shed. Do you need shelving? A workbench? A window for ventilation? A loft for extra storage? These decisions will impact your material list and construction.

Gathering Your Materials: The Shopping List

This is where things get a bit more detailed. The exact quantities will depend on your specific design, but here's a comprehensive list to get you started. Remember to add a little extra for cuts and mistakes â€" better to have leftover lumber than to run short mid-project!

  • Pressure-treated lumber: For the foundation (skids or concrete piers), sill plates, floor joists, and exterior walls. Choose a quality grade.
  • Untreated lumber: For interior walls, rafters, roof sheathing, and trim. Consider using cedar or redwood for a naturally rot-resistant option.
  • Plywood or OSB: For the roof sheathing and possibly the exterior walls (if you're not using siding).
  • Roofing material: Asphalt shingles, metal roofing, or even corrugated plastic are popular choices. Factor in the amount of roofing needed based on your shed's dimensions.
  • Siding (optional): Vinyl, wood, metal, or even T1-11 siding can enhance the look and weather protection of your shed.
  • Fasteners: You'll need plenty of nails, screws (various sizes), and possibly lag bolts.
  • Concrete (if using a concrete foundation): Calculate the amount needed based on the size of your footings.
  • Hardware: Hinges, door handle, window latches, etc.
  • Building paper or house wrap: To create a weather-resistant barrier under your siding and roofing.
  • Paint or stain (optional): To protect and beautify your shed.

Construction: Building Your 8x12 Shed

This section provides a general overview. Detailed plans from a professional would be best for more accurate instructions. Safety first! Always wear appropriate safety gear like safety glasses, gloves, and work boots.

Foundation

Start by preparing a level foundation. Options include:

  • Concrete piers: Durable and relatively simple to construct. Dig holes, set concrete forms, and pour concrete.
  • Skids: Simpler but less stable. Use pressure-treated 4x6 lumber to create a sturdy base.

Framing the Floor

Once your foundation is set, frame the floor using pressure-treated lumber for joists. Make sure they are properly spaced and secured to the foundation.

Framing the Walls

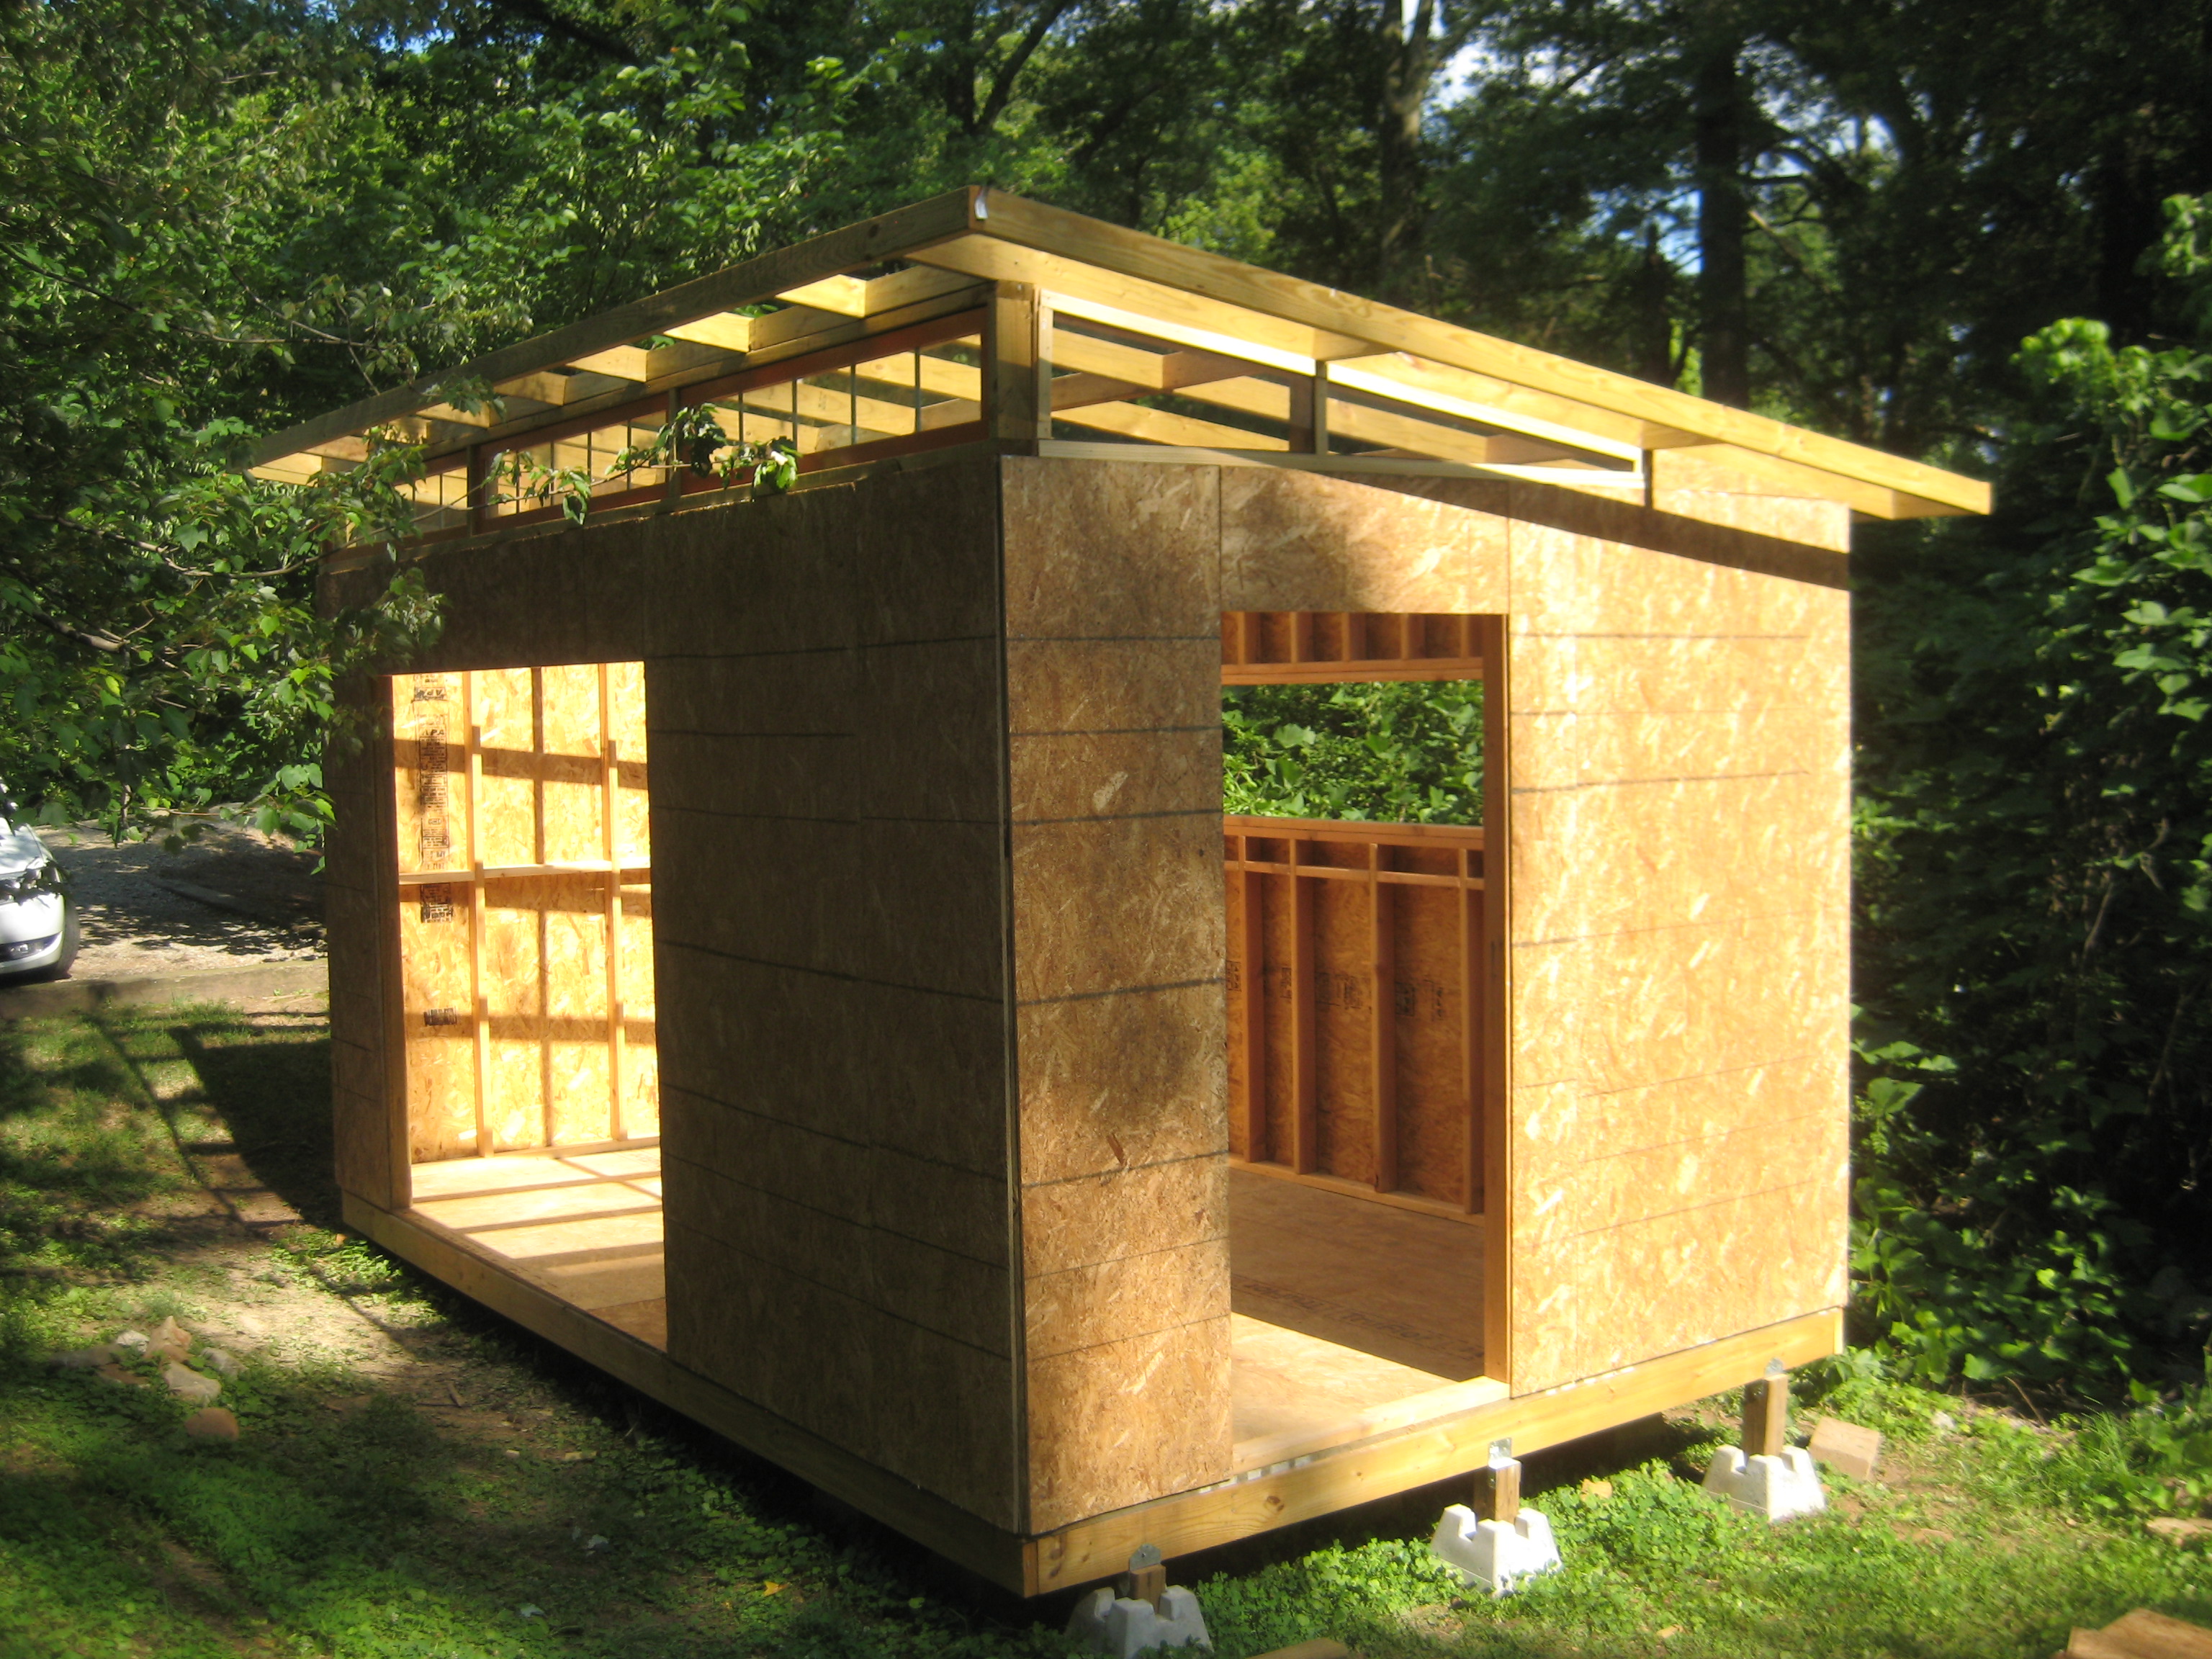
Construct the walls using your chosen lumber. Remember to include openings for doors and windows. Use a level and square to ensure everything is plumb and square.

Raising the Walls

Carefully raise the walls and secure them to the floor framing. This usually requires at least two people. Use temporary bracing to keep the walls stable until you secure the roof.

Roof Framing

Build the roof trusses or rafters according to your chosen design. This is a crucial step, so accuracy is key. Secure the trusses or rafters to the top plates of the walls.

Sheathing and Roofing

Install the roof sheathing (plywood or OSB), followed by your chosen roofing material. Make sure the roofing is properly sealed to prevent leaks.

Siding and Finishing

Install the siding, doors, windows, and any other finishing touches. Add trim for a professional look. Consider painting or staining the shed for protection and aesthetics.

Frequently Asked Questions (FAQs)

Here are some questions I often get asked about building sheds:

  • Q: How long does it take to build an 8x12 shed? A: This depends on your experience and the complexity of your design. Expect anywhere from a weekend to several weeks for a complete build.
  • Q: How much does it cost to build an 8x12 shed? A: Costs vary significantly depending on materials, location, and labor. Expect to spend anywhere from $1000 to $5000 or more.
  • Q: Do I need any special tools? A: Basic carpentry tools are essential. This includes a hammer, saw, level, measuring tape, drill, and possibly a nail gun. You might rent some tools if you don't own them.
  • Q: Can I build a shed by myself? A: While possible, it's generally easier and safer to have a helper, especially when raising the walls and installing the roof.
  • Q: What about electricity and insulation? A: These are optional additions. If you want electricity, you'll need to consult with an electrician. Insulation can improve the shed's comfort and energy efficiency. This adds to the complexity and cost of the project.
  • Q: What if I make a mistake? A: Don't worry! Everyone makes mistakes. Take your time, double-check your measurements, and don't be afraid to ask for help or advice.

Building your own shed is a fantastic project. With careful planning, the right materials, and a little elbow grease, you'll have a beautiful and functional storage solution in no time! Remember to consult with local building codes and professionals for any complex aspects of the construction. Good luck and happy building!

Share:

DIY Simple 8x6 Shed Plans for Compact Storage Solutions

DIY Simple 8x6 Shed Plans for Compact Storage Solutions

DIY Simple 8x6 Shed Plans for Compact Storage Solutions

This comprehensive guide provides detailed plans for constructing a simple yet robust 8x6 shed, perfect for compact storage solutions. The design prioritizes ease of construction for DIY enthusiasts with moderate woodworking skills, emphasizing clarity and practicality throughout the process. This shed, though small, offers surprising storage capacity and can be adapted to suit individual needs and aesthetic preferences.

I. Planning and Preparation

A. Site Selection and Preparation

Choosing the right location is crucial. Consider factors like accessibility, proximity to power sources (if electrical fittings are planned), sunlight exposure (for natural ventilation and drying), and drainage. The ground must be level; significant unevenness will necessitate leveling with compacted gravel or a concrete slab. Mark the shed's dimensions using stakes and string to ensure accurate placement before proceeding. Obtain any necessary permits from your local authorities before commencing construction.

B. Material List and Cost Estimation

Accurate material estimation is paramount to avoid costly delays. The following list provides a general guideline; quantities may need adjustments based on specific design choices and material availability. Prices are estimates and may vary depending on location and retailer.

  • Pressure-treated lumber (4x4 posts): 4 posts (approximately 8ft long) â€" $Cost
  • Pressure-treated lumber (2x4 framing): Quantity will vary depending on wall height and design; approximately 50-70 linear feet â€" $Cost
  • Pressure-treated lumber (4x6 floor joists): 3-4 joists (8ft long) â€" $Cost
  • Plywood (5/8 inch): Enough for floor, walls, and roof; typically 2-3 sheets depending on design â€" $Cost
  • Roofing felt: One roll â€" $Cost
  • Shingles/metal roofing: Quantity depends on roof area and chosen material â€" $Cost
  • Exterior siding (optional): Your choice of material and quantity â€" $Cost
  • Hardware: Nails (various sizes), screws, galvanized bolts, hinges, latch, etc. â€" $Cost
  • Concrete mix (optional): If using a concrete base â€" $Cost

Remember to add contingency for unforeseen expenses and material waste. Obtain multiple quotes from different suppliers to ensure you are getting the best prices.

C. Tool Checklist

Having the right tools significantly improves efficiency and safety. Ensure you have the following:

  • Measuring tape
  • Level
  • Shovel
  • Post hole digger (or auger)
  • Hammer
  • Circular saw or hand saw
  • Drill with various drill bits
  • Screwdriver (various types)
  • Safety glasses
  • Work gloves
  • Safety boots

Additional tools may be needed depending on the chosen roofing and siding materials.

II. Construction Phase

A. Foundation

A concrete slab provides a durable and level base. Alternatively, a gravel base can be used, but requires more attention to drainage. For a concrete base, excavate to the required depth, construct a formwork, and pour the concrete, ensuring it is level and allowed to cure completely before proceeding. For a gravel base, dig out the area, compact the gravel thoroughly, and create a level surface.

B. Framing

Construct the floor frame using the 4x6 joists, spaced appropriately (16 inches on center is a common practice). Securely attach them to the foundation using galvanized bolts. Next, erect the wall frames using 2x4 lumber, ensuring the walls are square and plumb using a level. Corner posts should be securely joined using appropriate joinery techniques, such as mortise and tenon joints or robust corner brackets. Remember to incorporate openings for doors and windows if desired.

C. Sheathing and Roofing

Attach plywood sheathing to the exterior walls and floor frame, ensuring proper alignment and secure fastening. Then, construct the roof frame using 2x4 lumber, following your chosen roof design (e.g., gable, shed). Install roofing felt over the roof frame to provide a weatherproof barrier before applying the chosen roofing material (shingles, metal, etc.).

D. Siding and Finishing Touches

If using exterior siding, install it according to the manufacturer's instructions, ensuring a weathertight and aesthetically pleasing finish. Install the door and any windows, and fit the chosen hinges and latch. Apply any necessary caulking to seal joints and prevent water ingress. Consider adding features like shelves or workbenches inside the shed to optimize storage capacity.

III. Safety Considerations

Safety should be a paramount concern throughout the construction process. Always wear appropriate safety gear, including safety glasses, gloves, and sturdy footwear. Use caution when operating power tools, ensuring they are in good working order and used according to manufacturer instructions. Seek assistance if lifting heavy materials or performing tasks beyond your capabilities. Ensure the shed is structurally sound before storing valuable items. Regularly inspect for any signs of damage or wear and tear.

IV. Customization and Upgrades

This basic design can be customized to suit individual needs. Consider adding features such as:

  • Windows: For improved natural light and ventilation.
  • Ventilation: Vents in the roof or walls can prevent moisture buildup.
  • Shelving: Maximize storage space with custom-built shelving units.
  • Electrical wiring: (Consult a qualified electrician) For lighting and power tools.
  • Insulation: For increased thermal efficiency in colder climates.
  • Painting or staining: Enhance the shed's aesthetics and protect the wood from the elements.

Remember to always consult with relevant professionals for any tasks beyond your skillset, ensuring the safety and structural integrity of your shed. With careful planning and execution, this DIY project can provide a valuable and long-lasting addition to your property, offering convenient and secure storage for years to come.

Share:

Simple 8x6 Shed Plans for Small Backyard Storage Solutions

Simple 8x6 Shed Plans for Small Backyard Storage Solutions

Simple 8x6 Shed Plans for Small Backyard Storage Solutions

Hey there, fellow DIYers! Are you staring at a cluttered backyard, dreaming of a neat and organized space? Do you need extra storage but don't want to shell out a fortune for a pre-built shed? Then you've come to the right place! This guide will walk you through building a simple, yet sturdy, 8x6 shed â€" perfect for small backyards and big storage needs. We'll cover everything from planning and materials to construction, making this project achievable even for beginners.

Planning Your 8x6 Shed

Before you even think about grabbing a hammer, some careful planning is essential. This will save you headaches (and potentially money) down the line.

Choosing Your Location

First things first: where will your new shed live? Consider the following:

  • Accessibility: Will you need a clear path for moving things in and out?
  • Sun and Shade: Think about how much sun exposure the shed will get. Too much sun could damage stored items, while too much shade might lead to dampness.
  • Ground Conditions: Is the ground level and firm? You might need to level the area before starting construction.
  • Local Regulations: Check with your local council or homeowners association about any building permits or restrictions.

Determining Your Shed's Purpose

What are you planning to store in your shed? This will influence your design choices. Are you storing garden tools, bicycles, sports equipment, or a combination? Knowing this will help you determine things like the need for shelving, hooks, or even electrical outlets.

Sketching Your Design

A simple sketch can be invaluable. You don’t need to be an architect! Just draw a basic rectangle (8ft x 6ft) and note where you plan to put doors, windows (if any), and any internal features like shelves. This will help you visualize the project and calculate materials.

Gathering Your Materials

This is where the real fun (and possibly some muscle strain!) begins. Here's a basic list of materials you'll likely need. Remember, these quantities are estimates; adjust them based on your specific design and local lumber pricing.

  • Pressure-treated lumber: For the frame, floor, and exterior walls. Choose appropriate dimensions (e.g., 4x4 posts for the corners, 2x4s for the framing). You'll need a significant amount, so check pricing and potentially buy extra for unexpected issues.
  • Plywood or OSB: For sheathing the walls and roof. Again, the amount will depend on the shed's dimensions.
  • Roofing material: Asphalt shingles are a common and relatively inexpensive choice. Consider the local climate â€" a heavier-duty material might be needed in areas with heavy snowfall or high winds.
  • Doors and hardware: A single door will suffice for an 8x6 shed. Make sure to choose appropriate hinges, handles, and a latch or lock.
  • Fasteners: Nails, screws, and possibly bolts. Galvanized fasteners are best for outdoor use.
  • Concrete blocks or pier supports: For creating a foundation. This is crucial for stability and to prevent rot.
  • Paint or sealant: Protect your shed from the elements with an appropriate exterior-grade paint or wood sealant.
  • Tools: You'll need a variety of tools, including a measuring tape, saw (circular saw or hand saw), hammer, drill, level, shovel, and potentially a post-hole digger.

Building Your 8x6 Shed: A Step-by-Step Guide

This is a simplified overview. For detailed instructions with diagrams, I strongly recommend consulting specific shed building plans online or from books. Safety first! Always wear appropriate safety gear, such as safety glasses and work gloves.

Foundation

Start by preparing a level base for your shed. This could involve laying a concrete slab, using concrete blocks, or setting pressure-treated wooden posts in the ground. Proper leveling is essential for a stable and long-lasting shed.

Framing

Construct the frame using your pressure-treated lumber. Begin with the floor frame, then erect the walls, ensuring they are square and plumb. Remember to incorporate openings for your door.

Sheathing

Once the frame is complete, attach the plywood or OSB sheathing to the exterior walls. This provides structural integrity and a surface for your exterior finish.

Roofing

Construct the roof trusses (or use pre-made trusses) and attach the roofing material. Make sure the roof has adequate slope to allow for water runoff.

Finishing Touches

Hang your door, add any windows, and finish the exterior with paint or sealant. Consider adding interior features like shelving or hooks to maximize storage space.

Tips for Success

  • Take your time: Building a shed is a process. Don’t rush; accuracy is key.
  • Check your measurements constantly: Double-check everything to ensure everything is square and level.
  • Ask for help if needed: Don’t be afraid to ask a friend or family member for assistance.
  • Enjoy the process: Building something with your own two hands is incredibly rewarding!

Frequently Asked Questions

Here are some common questions people ask about building a small shed:

Q: Do I need a building permit?

A: Building regulations vary by location. Check with your local council or homeowners association to determine whether a permit is required for your shed.

Q: How long will it take to build?

A: The timeframe depends on your experience and the complexity of the design. Expect to spend several weekends, potentially longer for beginners.

Q: How much will it cost?

A: The cost varies significantly depending on materials and your location. You can expect to spend anywhere from a few hundred to a thousand dollars or more.

Q: Can I build this shed myself, even if I'm a beginner?

A: Yes! While it requires some effort, a simple 8x6 shed is a manageable project for a DIY enthusiast with basic carpentry skills. Plenty of resources (online tutorials, books) are available to guide you through each step.

Q: What kind of foundation is best?

A: Concrete blocks or a concrete slab offer excellent stability. Pressure-treated wooden posts are also a viable option, but they require more attention to prevent rot.

I hope this guide helps you on your journey to building your own 8x6 shed! Happy building!

Share:

How to Build a 6x8 Shed: Plans and Cost Estimation Guide

How to Build a 6x8 Shed: Plans and Cost Estimation Guide

How to Build a 6x8 Shed: Plans and Cost Estimation Guide

Building your own shed is a rewarding project that saves you money and allows you to customize the space to your exact needs. This guide walks you through constructing a sturdy 6x8 shed, offering detailed plans and a realistic cost estimation. Get ready to transform your outdoor space!

Planning Your 6x8 Shed

Before you even pick up a hammer, meticulous planning is key. This phase determines the success of your project. Start by defining the shed's purpose: Will it house gardening tools, bicycles, or serve as a small workshop? This dictates the interior layout and features you'll need. Next, secure the necessary permits from your local authorities. Don't skip this crucial step to avoid potential fines or legal issues. Choose a level, well-drained location for your shed. Consider proximity to power sources if you plan on adding electricity later. Finally, sketch a detailed plan, including dimensions, door placement, window placement (if any), and the type of roofing you'll use. A well-thought-out plan ensures smooth construction and avoids costly mistakes.

Material Selection

Choosing quality materials directly impacts your shed's durability and lifespan. Opt for pressure-treated lumber for the foundation and floor joists to resist rot and insect damage. Consider using cedar or redwood for a more aesthetically pleasing and naturally rot-resistant option, though these are more expensive. For the walls and roof, standard construction lumber is sufficient. Remember to factor in the cost of roofing materials â€" asphalt shingles are budget-friendly, while metal roofing offers superior durability. Don't forget essential hardware like nails, screws, hinges, and a door handle. A detailed materials list, created from your plan, will help you accurately estimate costs.

Step-by-Step Construction Guide

Building a shed involves several key steps. Begin by preparing the foundation. A concrete slab is ideal for long-term stability, but a gravel base provides a simpler, more budget-friendly alternative. Next, construct the floor frame, ensuring levelness and secure connections. Erect the walls, carefully aligning and securing the framing members. Install the sheathing (plywood or OSB) over the framing, creating a solid base for siding and roofing. Once the walls are complete, carefully assemble and attach the roof trusses or rafters, depending on your chosen roof design. Finally, install the roofing material, ensuring a watertight seal. Add your chosen siding, install the doors and windows, and add any finishing touches.

Essential Tools

Gather your essential tools before starting. This includes a measuring tape, level, saw (circular saw or hand saw), drill, hammer, screwdriver, nail gun (optional but highly recommended), and safety glasses. Consider renting more specialized tools like a post hole digger if needed. A well-stocked toolbox saves time and frustration during construction.

Cost Estimation

The cost of building a 6x8 shed varies depending on material choices and your location. However, here's a breakdown of potential expenses:

  • Lumber: $300 - $500
  • Roofing materials: $150 - $300
  • Foundation materials (concrete or gravel): $50 - $200
  • Hardware: $50 - $100
  • Doors and windows (if applicable): $100 - $300
  • Siding (optional): $50 - $200
  • Tools (rental or purchase): $50 - $200

Total Estimated Cost: $850 - $1900

This is a rough estimate; prices may vary significantly depending on your region and material choices. Remember to factor in potential unforeseen costs. This price range doesn’t include labor if you hire help.

Safety First!

Safety is paramount throughout the entire building process. Always wear appropriate safety gear, including safety glasses, work gloves, and hearing protection when using power tools. Follow proper lifting techniques to avoid injuries. Never rush the process; take breaks when needed and work at a pace that ensures accuracy and safety. If you’re uncomfortable with any aspect of the construction, don’t hesitate to seek professional help.

Building a 6x8 shed can be a fulfilling experience. With careful planning, quality materials, and attention to detail, you can create a functional and attractive addition to your property. Enjoy the process!

Share:

DIY 8x12 Shed: How to Build the Perfect Storage Shed for Your Yard

DIY 8x12 Shed: How to Build the Perfect Storage Shed for Your Yard

DIY 8x12 Shed: How to Build the Perfect Storage Shed for Your Yard

Tired of clutter piling up in your garage or overflowing from your closets? Building your own 8x12 shed offers a fantastic solution, providing ample storage space while adding value to your property. This comprehensive guide walks you through each step, empowering you to construct the perfect storage shed tailored to your needs. Forget expensive contractors and embrace the satisfaction of a DIY project that will stand the test of time. Let's get started!

Planning and Preparation: Laying the Foundation for Success

Before you even pick up a hammer, meticulous planning is paramount. This phase determines the success of your entire project. Begin by securing the necessary permits from your local authorities. Next, carefully choose a level location for your shed, considering factors like sunlight, drainage, and proximity to utilities. Mark the shed's dimensions using stakes and string. Now you'll need to create a solid foundation. You have options here; a concrete slab provides the most robust base, while a gravel base offers a simpler, more budget-friendly alternative. Ensure your chosen foundation is perfectly level and large enough to accommodate the shed's footprint, adding a few extra inches for stability.

Choosing Your Materials: Quality over Quantity

Selecting high-quality materials significantly impacts the shed's longevity and overall appearance. Opt for pressure-treated lumber for the foundation and framing, ensuring resistance to rot and insects. Consider using exterior-grade plywood for the walls and roof, providing weather protection. Don't forget about necessary hardware, including screws, nails, hinges, a lock, and weather stripping. Purchasing all materials at once prevents costly delays and ensures consistency. Create a detailed materials list based on your chosen plan to avoid any shortages during construction. Remember, measuring twice and cutting once is crucial to minimize waste and ensure accurate construction.

Constructing the Frame: Building the Shed's Skeleton

With your foundation prepared and materials gathered, you're ready to erect the shed's frame. Begin by building the floor frame, ensuring it's perfectly square and level. Next, construct the walls, using your pre-cut lumber and paying close attention to accurate measurements and plumb lines. Secure the corner posts firmly, using appropriate connectors and bracing to provide maximum stability. Remember, strong and accurate framing is the backbone of your shed. Once the walls are assembled, carefully lift them into place and secure them to the floor frame, creating a robust and square structure. Accurate measuring and assembly at each stage is critical for a stable shed.

Adding the Roof: Protecting Your Investment

The roof offers crucial protection against the elements. Begin by constructing the roof trusses according to your plan, ensuring they are equally spaced and securely fastened. Once the trusses are complete, lift them carefully onto the walls and secure them firmly. Install roofing sheathing, followed by your chosen roofing material, whether asphalt shingles, metal, or another option. Ensure proper overhang on all sides to protect the walls from rain and snow. Proper sealing around the edges and ventilation will ensure the longevity of your roof.

Finishing Touches: Adding the Finishing Touches

Once the roof is complete, you can focus on the finishing touches. Install the exterior siding, ensuring a weathertight seal around all openings. Add doors and windows, securing them tightly with appropriate hardware. Consider adding features like shelving, workbenches, or even electricity to enhance functionality. Finally, apply a protective coating of paint or stain to protect the wood and enhance the aesthetic appeal of your new shed. A final cleanup will leave you with a professional-looking structure you can be proud of.

Safety First: Working Safely Throughout the Project

Throughout the entire building process, prioritize safety. Always wear appropriate safety gear, including safety glasses, work gloves, and sturdy footwear. Use proper lifting techniques to avoid injuries. Follow all manufacturer instructions for tools and materials. If you encounter any tasks beyond your skill level, don't hesitate to seek professional assistance.

Building your own 8x12 shed is a rewarding experience that provides valuable storage space and a sense of accomplishment. By following these steps and taking your time, you can create a durable and attractive addition to your yard. Enjoy the process, and happy building!

Share:

12x20 Gable Shed with Loft Plans: Classic and Functional Design

12x20 Gable Shed with Loft Plans: Classic and Functional Design

12x20 Gable Shed with Loft Plans: Classic and Functional Design

This document provides comprehensive plans for constructing a 12x20 gable shed incorporating a functional loft. This design prioritizes classic aesthetics with a focus on practicality and efficient use of space. The detailed specifications presented here aim to guide experienced DIY enthusiasts through the construction process, offering a robust and versatile storage solution.

I. Overall Design and Dimensions

The proposed shed measures 12 feet wide by 20 feet long, with a gable roof offering ample headroom in the loft area. The overall height will depend on local building codes and personal preferences but a suggested peak height is approximately 10-12 feet. This design prioritizes ease of construction while maintaining a visually appealing profile. The gable style allows for excellent ventilation and natural light penetration, minimizing the need for extensive artificial lighting.

A. Foundation Considerations

A robust foundation is crucial for longevity and stability. Options include:

  • Concrete Slab: Provides a level, durable base, ideal for heavier loads. Requires professional installation or significant DIY experience.
  • Gravel Base with Pressure-Treated Skids: A cost-effective solution, particularly suitable for well-drained soil. Requires meticulous leveling to ensure stability.
  • Concrete Piers: Offers a compromise between cost and durability, suitable for uneven terrain. Requires precise placement to guarantee structural integrity.

The chosen foundation type should be determined based on soil conditions, budget, and the builder's skill set. Ensure adherence to all local building codes and regulations regarding foundation requirements.

B. Framing Specifications

The framing will employ standard dimensional lumber, preferably pressure-treated pine or fir for durability and resistance to rot and insect infestation. The following dimensions are suggested:

  • Floor Joists: 2x8s spaced 16 inches on center.
  • Wall Studs: 2x4s spaced 16 inches on center.
  • Rafters: 2x6s spaced 24 inches on center.
  • Ridge Beam: 4x6 or 6x6 depending on roof snow load.

All framing members should be properly treated for pest and weather resistance. Accurate measurements and precise cutting are paramount to ensure structural integrity. Detailed plans showing the layout of all framing members will be provided separately. Consult local building codes for specific requirements on framing materials and construction techniques.

II. Loft Design and Accessibility

The loft area offers valuable additional storage space, accessible via a built-in staircase. The design incorporates a sturdy staircase for safety and ease of access. The loft floor will be constructed using 2x6 joists, spaced 16 inches on center, to support the anticipated load.

A. Staircase Construction

The staircase will be constructed with pressure-treated lumber for durability and will adhere to building codes regarding rise and run dimensions for optimal safety. Handrails and adequate headroom are essential features to ensure safe ascent and descent.

B. Loft Floor Design

The loft floor will consist of plywood sheathing, securely fastened to the joists, providing a stable surface for storage items. The plywood should be of sufficient thickness to support the weight capacity planned for the loft.

III. Exterior Cladding and Roofing

The exterior of the shed will be clad with durable materials to withstand the elements. Several options exist depending on budget and aesthetic preferences:

  • Vinyl Siding: Low-maintenance and visually appealing, offering a wide range of color choices.
  • Wood Siding: A classic look, requiring regular maintenance to prevent rot and insect damage.
  • Metal Siding: Durable and long-lasting, providing excellent protection against harsh weather conditions.

The roof will be covered with architectural shingles, ensuring water resistance and longevity. The slope of the gable roof will be sufficient to facilitate effective water runoff. Proper flashing and sealing around chimneys, vents, and other penetrations are essential to prevent leaks.

A. Window and Door Placement

The shed design incorporates one or more windows for natural light and ventilation. A standard shed door will be situated for convenient access. The precise placement of windows and doors should be determined to maximize natural light and minimize interference with internal storage.

IV. Interior Finishing and Insulation

The interior of the shed can be customized based on its intended use. Consider these options:

  • Drywall: Offers a clean, finished look and provides a surface for painting or wallpapering.
  • Paneling: A cost-effective alternative to drywall, offering a rustic or modern aesthetic depending on the choice of material.

Insulation is recommended, particularly if the shed is to be used year-round. Fiberglass insulation batts are a common and effective option, ensuring thermal comfort and reducing energy consumption. Vapor barriers should be installed to prevent moisture damage.

V. Electrical and Plumbing Considerations (Optional)

The inclusion of electrical wiring and plumbing is optional, depending on the intended use of the shed. If electricity is required, ensure adherence to all local electrical codes. A qualified electrician should perform the wiring installation. Similarly, any plumbing installations should comply with all relevant plumbing codes and be carried out by a licensed plumber.

VI. Building Permits and Inspections

It is crucial to obtain the necessary building permits before commencing construction. This ensures compliance with local building codes and regulations. Inspections will likely be required at various stages of the construction process to verify compliance with building codes and safety standards. Failure to obtain permits and undergo inspections may result in penalties or legal issues.

This detailed plan provides a foundation for constructing a 12x20 gable shed with a loft. While comprehensive, it serves as a guideline, and adjustments might be necessary based on specific site conditions and personal preferences. Consult with local building officials and experienced contractors for any clarification or specific requirements in your area.

Share:

Contemporary garden sheds plans | Best garden sheds UK 2022: metal, wooden, corner and barn options for outdoors, from Wickes, Sheds.co.uk


42+ Shed Designs, Ideas Design Trends - Premium PSD, Vector Downloads

Best garden sheds UK 2022: metal, wooden, corner and barn options for outdoors, from Wickes, Sheds.co.uk also Metal Garden Sheds For Sale Ireland Flat Pack Sheds Running Contemporary garden sheds plans and maybe you want to know about 42+ Shed Designs, Ideas Design Trends - Premium PSD, Vector Downloads, Then this is best place, Below are some picture taken from various source from online Small modern tropical house.

Since it appeared to be famous Wells-next-the-Sea, currently Contemporary garden sheds plans is now very popular within the country. you can find a great many which help it become an activity to provide a income accordingly throughout the content we show my personal things in addition to desire it will be useful for most people and this simmilar to Build a 12'x20' modern shed and deck by yourself: with material list and Lifetime 8' x 8' modern shed model 60336 lifetime assembly video.

Another Building a shed from start to finish - lean to style shed

- Modern layout allows shearers to get the job done
- Shedding light on garden storage
- 5 backyard studio designs to inspire
- A-list celeb splashed out £650,000 on a shed with stunning sea views – but can YOU guess who it was?
- More than a shed: Outbuildings add utility and fun to extra yard space
- Sheds alight - Eltham
- Handy Home Products 8 ft. x 12 ft. Meridian Shed
- Live in shed plans nz

Quality Contemporary Sheds - Hardwood or Softwood Contemporary sheds

Quality Contemporary Sheds - Hardwood or Softwood Contemporary sheds

Image result for mid-century modern storage shed Modern shed

Image result for mid-century modern storage shed Modern shed

Beautiful Designs of Modern Garden Shed

Beautiful Designs of Modern Garden Shed

Inspiring Modern Garden Shed Contemporary Shed Is The Wonderful

Inspiring Modern Garden Shed Contemporary Shed Is The Wonderful

Northwest Modern Shed Modern shed, Shed design, Building a shed

Northwest Modern Shed Modern shed, Shed design, Building a shed

Beautiful Designs of Modern Garden Shed Small garden tool shed, Shed

Beautiful Designs of Modern Garden Shed Small garden tool shed, Shed

Contemporary garden shed plans Hawk Haven

Contemporary garden shed plans Hawk Haven

Beautiful Designs of Modern Garden Shed

Beautiful Designs of Modern Garden Shed

www.studio-shed.com Great deck & in-progress 10x12 Studio Shed with

www.studio-shed.com Great deck & in-progress 10x12 Studio Shed with

Backyard modern shed play house Modern shed, Backyard, Building a

Backyard modern shed play house Modern shed, Backyard, Building a

9 Attractive Garden Sheds - OMG Lifestyle Blog

9 Attractive Garden Sheds - OMG Lifestyle Blog

Northwest Modern Shed Modern shed, Shed design, Building a shed

Northwest Modern Shed Modern shed, Shed design, Building a shed

Modern garden shed plans

Modern garden shed plans

Modern garden shed plans

Modern garden shed plans


Share: